You can set an event to show up every day for a period of time without having to make an event for every single day. This is called a spanned event.
How to set up a spanned event
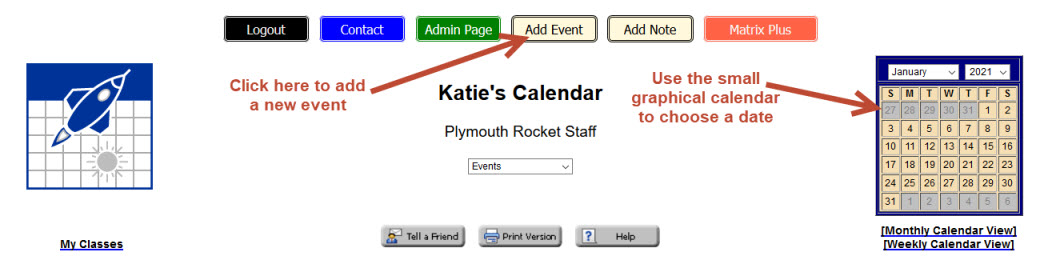
Click Add Event
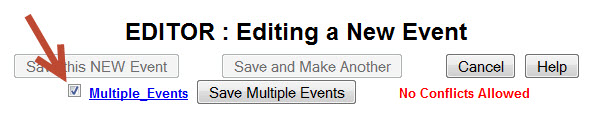
Go to the START DATE and make sure that the tiny check box above it is selected. Then go to END DATE and uncheck the check box above it.
Go to the small graphical calendar and pick the FIRST day you want the event to show up.
Now we will choose the end date by doing the opposite. Uncheck the box above START DATE and check the box above END DATE.
Go to the small graphical calendar and pick the LAST day you want the event to show up.
This should now show you two different dates in the start and end date fields. That event you make will show up every day until the end date.

Notes for spanned events
Feeds: A spanned event will only show up in an RSS, iCal, or EKfeed on the first day of the event. If you want the event to show up in the feed for every single day of the event time span, the make the event a MULTIPLE EVENT instead of a spanned event.
Month View: Spanned events will show up in the month view. However, if your spanned event bridges to events, like Mar15-Apr 15, the spanned event will only show up in the first month listed. In the example, the event will only show up in March, not April. To get around this, make two spanned events, one for the March dates and one for April dates.
Direct Link =
www.answerkeeper.com/ek_spannedevent
You can set an event to show up every day for a period of time without having to make an event for every single day. This is called a spanned event.
How to set up a spanned event
Click Add Event
Go to the START DATE and make sure that the tiny check box above it is selected. Then go to END DATE and uncheck the check box above it.
Go to the small graphical calendar and pick the FIRST day you want the event to show up.
Now we will choose the end date by doing the opposite. Uncheck the box above START DATE and check the box above END DATE.
Go to the small graphical calendar and pick the LAST day you want the event to show up.
This should now show you two different dates in the start and end date fields. That event you make will show up every day until the end date.
Notes for spanned events
Feeds: A spanned event will only show up in an RSS, iCal, or EKfeed on the first day of the event. If you want the event to show up in the feed for every single day of the event time span, the make the event a MULTIPLE EVENT instead of a spanned event.
Month View: Spanned events will show up in the month view. However, if your spanned event bridges to events, like Mar15-Apr 15, the spanned event will only show up in the first month listed. In the example, the event will only show up in March, not April. To get around this, make two spanned events, one for the March dates and one for April dates.
522
Direct Link =
www.answerkeeper.com/ek_spannedevent


 on a regular basis.